Thursday, May 17, 2012

Every End is a New Beginning

 So, this happened.

It's been more than a month and I'm still pretty stunned. Excited- elated even, but still stunned. Each year Tamarind takes eight students from all over the world to train in the PTP (printer training program) and from those 8 they choose one or two to stay on for another year as Senior Printer Fellows, who then work with Master Printer Bill Lagatutta, collaborate with professional artists, and become certified Master Printers themselves. This year they chose one person. And they chose me.

I don't have any pictures of the letter opening ceremony, but it went down something like this- Marge told us we'd get our letters Friday, April 13 at noon and that we could take the rest of the day off to process, re-coop, and/or celebrate. Around 11:30 we were all pretty jumpy, and, having finished my work for the day, sat anxiously at the computer watching COPS. Awesome, I know. Rodney had told us the week before they only be taking one person, so we knew ahead of time what to expect. Sure enough, noon rolls around, Marge comes down, gave us a small speech, thanked us for all our hard work, and handed out the letters. I got through the first two lines, realized it wasn't a rejection letter, and burst into happy tears. Following that, after a few phone calls, the rest of the day was just smiles, hugs, high fives and celebratory drinks.


As of last Friday my time at Tamarind as a PTP student has come to an end. I realize I haven't been keeping up with my posts as well as I should, and there's a lot to cover since my last update. I've been thinking about the best way to remedy this and my solution is this... mini posts! Lots of pictures with a cut down on the words- because let's face it, words are overrated and everyone likes pictures.


COLLABORATION 5


My collaboration #5 was with Scott Sutton, an architect graduate student from UNM who had previously helped out at Tamarind during our crayon making demo by providing the molds. Scott was also supposed to give a demo on ink making using natural pigments but the funding fell through. Most of the collaborations Scott did throughout the class were based on the area he was studying for his thesis work, a stretch of land along the Columbia River in Oregon and the native population that once lived there before the dam was constructed. For our collaboration Scott decided to do a map of this Celilo area, outlining where the agriculture, river, forested areas, and various villages and important landmarks fell. We sat down together and discussed what information had to go on each plate so that we could overlap primary colors to create secondary colors. I then mixed up two pallette for Scott to look at- a more vibrant set and a more muted set (seen above). We both decided the muted was the way to go, and after a few trial proofs, pulled the edition. The registration had to be spot on, otherwise the whole thing would look off, but overall the whole thing went off without a hitch. 

"Celilo Map" by Scott Sutton


Santa Fe- Letterpress Museum and Landfall Press

James Bourland demonstrating one of the Chandler and Price presses.


Around the end of April we were invited to Santa Fe's Palace of the Governor to the see the Palace Press Letterpress Museum.  James Bourland was kind enough to tell us about the museum, the collection of work produced at the Palace Press, and show off the beautiful antique presses the museum has collected over the years.
Our visit didn't last long, and after a brief look at the History Museum's exhibition and a quick lunch we meandered our way over to Landfall


So maybe we got lost for twenty minutes trying to find the place, but it was all worth it when we walked in the door and saw -this-. An antique Marinoni press from Paris that Toulouse Lautrec once printed on. It was huge, beautiful, and very, very impressive.

Landfall is run by founder and president Jack Lemon and director Stephen Campbell, two legendary printmakers originally out of Chicago that came to Santa Fe in the early 2000's. They were kind enough to show us their brand new building, and even gave a dry run of the Marinoni press (no ink, no water, just demonstrated how the print gets run through the press). For such a big machine it was amazingly quiet, and demonstrated quite the feat of teamwork, since it took three people to handle the paper.

The rest of the shop was equally impressive, with high ceilings, flying tympans (that is, tympans suspended from the ceiling), and oodles of John Wayne memorabilia. Jack and Steve were fantastic hosts and made us all feel very welcome.
Jack Lemon telling Rodney to stop that strange girl from taking so many pictures. Or pointing out something interesting, it's hard to tell sometimes.


(Above: an overhead view of the right side of the shop, and Steve Campbell talking with Marvin)

Easily my most favorite thing in the shop.


Following Landfall we took a trip to the Second Street Brewery and managed a great photo-op with Rodney before checking out the Santa Fe gallery scene, sitting in on a lecture given by Bill Lagatutta, Jack Lemon and Steve Campbell about collaborative printing and the idea of a "Master Printer" before finally calling it a day.


Collaboration 6

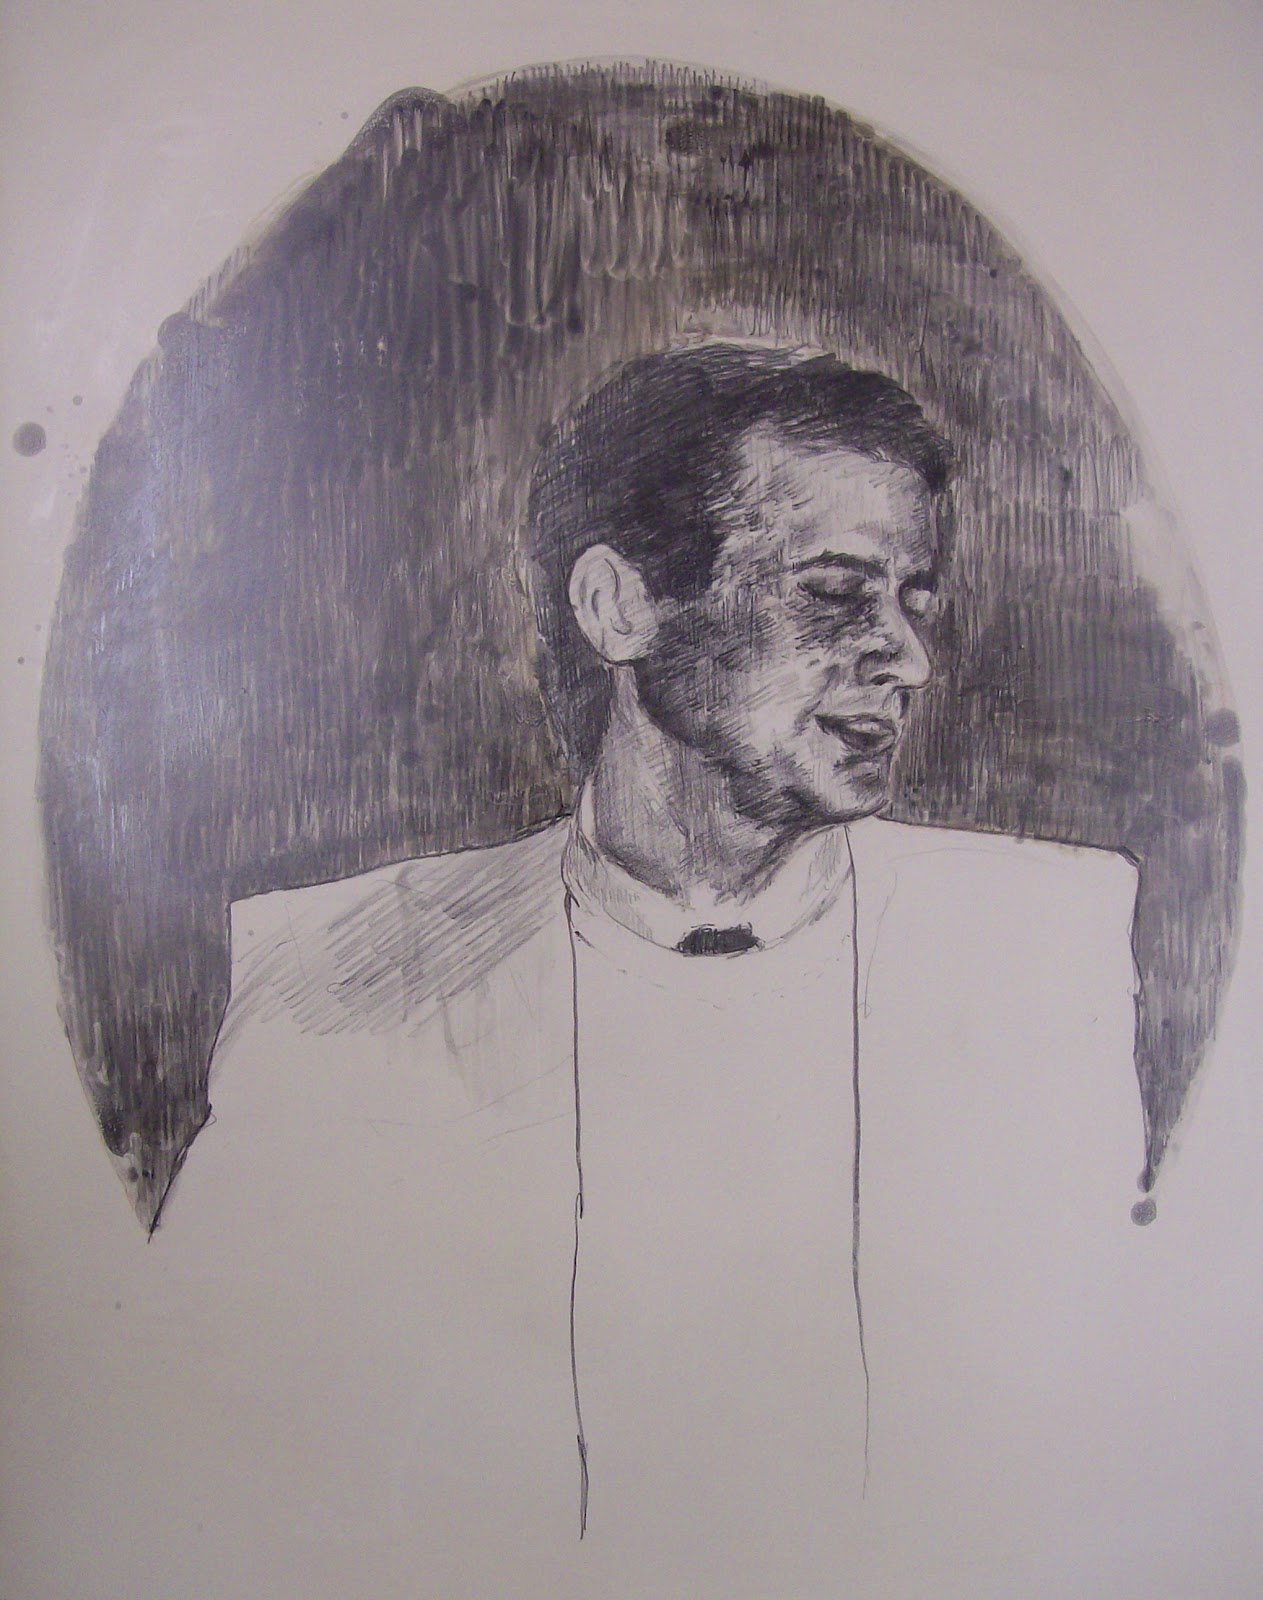
My sixth and final collaboration was with Rachel Cox, a graduate student studying photography. Rachel knew pretty quickly what she wanted and had her imagery all sorted early on. She knew she wanted a large, full-sheet bleed print that was mostly blacks utilizing photos she had taken and then manipulated of her grandmother mirrored. When we first started the project we ran into some problems printing the films to shoot the photo plate, getting them dark enough and printing smoothly enough that there weren't any banded lines on them. My initial thought was to print them inverted and create a negative diazo plate since I hadn't done one last semester, we still had the material, and it would save on toner without having to worry about the image appearing "striped" from the printer. Then Rodney mentioned we have a collection of negative plates that were donated to Tamarind and that I was more than welcome to use those. Oh, and that they were 20 years old. And might not work. And might make me cry. Thus begins- the struggle. The first challenge was to find the exposure time (which ended up being at 130 seconds, versus the 25-30 seconds of a usual positive plate), find out if the negative developer still worked, how long to rock it or if it needed to be scrubbed (yes, slowly, and scrubbed) and then figure out how to print the thing without it all filling in. That last part was the real challenge. The plate mostly stayed open with a leather roller, but as soon as I had to go to a rubber roller or a grabbit roller (a textured rubber roller that is supposed to simulate a leather roller) the whole image filled in and looked terrible. The added challenge of printing a large black image into bare paper didn't help things either. After nearly a week and a half of struggle and problem solving Rodney and I decided to use ProSol, an old chemical bichromate agent that hardens in light and keeps the negative areas open. We then hit it with TrueBlue, another old chemical agent that deep cleans the printing areas. This miracle combo was just what that plate needed. I also decided to print a transparent base first so the black ink wasn't being sucked up into bare paper. It meant less ink had to be used on the second run (the black) so delicate areas didn't fill in and get overrun with ink. I don't have many images from this collaboration. After the edition was printed and I realized I had enough to make my number I took my frustration out on the plate and forgot to photograph it (oops). In the end, however, the results made up for the difficulty. Pictures really don't do justice to the velvety soft black, and really subtle tones of this print, it's absolutely beautiful in person.

By Rachel Cox


Graduation!

When all was said and done, all the editions printed, and final critique finished, we finally graduated. Bill had a fantastic little get together at his house, and Marge and Rodney handed out our certificates. I made a litho stone cake- an idea I shamelessly ripped off from my friend Elise :) and just enjoyed the night. While it was terrific celebrating it being over and done with the true highlight of the night came in the form of Isaac, playing his guitar and singing for us, and our visiting artist from Japan, Kouri, who did his Elvis Presley impersonation and sang a collection of his songs. Isaac even improvised backup guitar.
Rodney and Marge giving out the certificates and totes!


Senior printer Alex getting his certificate.
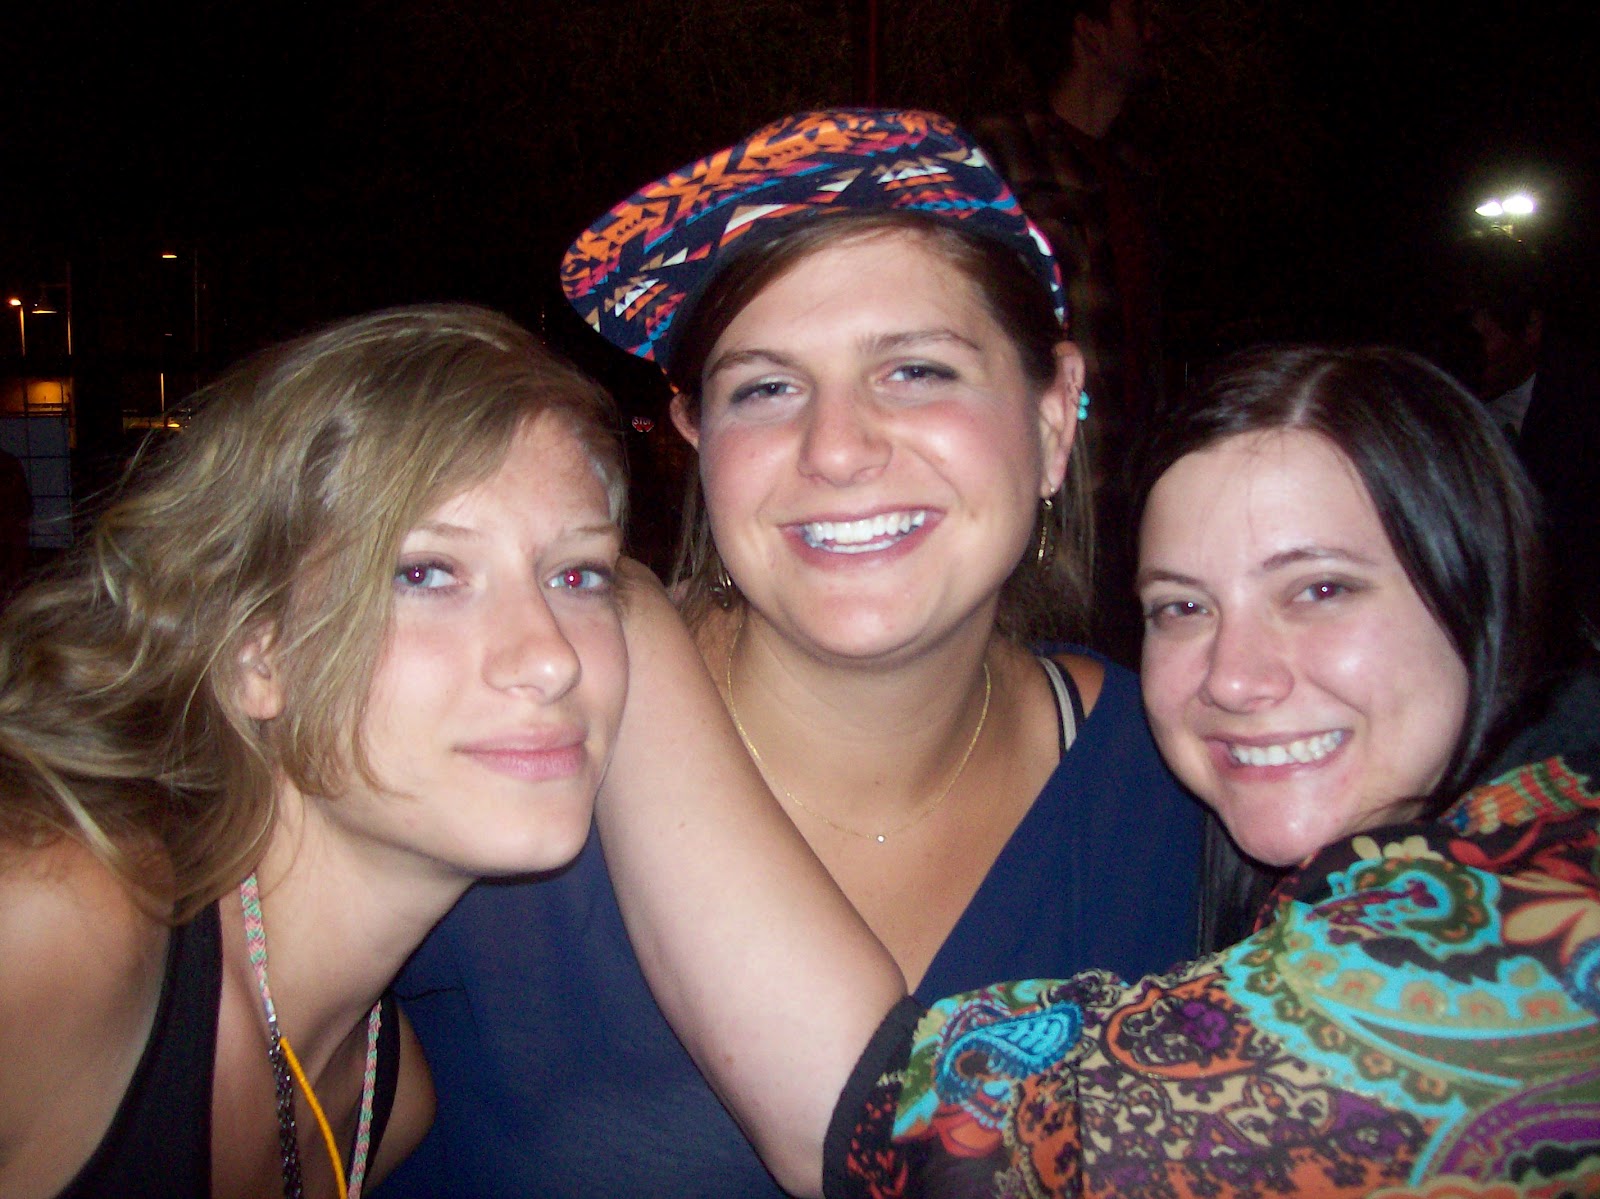
Going to miss these ladies! Kim Michalak, Nina Dine and myself


Certified!


Friday, March 30, 2012

Collaboration 4 and Breaking Bad

Working on the limestone
So apparently there's this thing called "March Madness".  Word on the street it has something to do with "sports". Both of these things are fairly foreign to me, but I like the sound of "March Madness" and for me and my next collaborating artist it was "March Mastic Madness". That's right folks. Barnes's mastic resin asphaltum reduction once again! Not just once-but twice!

My next collaborating artist was Elizabeth Sobel, an undergraduate student from UNM with an amazing drawing style. For her previous projects Elizabeth built up her image to create rich blacks and subtle grays, and based on her past images I thought working reductively to pull out her brights and highlights would be faster than building them up. This was also the first time we had three weeks to complete a project instead of the two we had before. I knew that most of the time allotted for the project would go toward creating the image itself because of the detail and the size- a full sheet 22" x 30".


So, while Elizabeth was working on her image I started a small project of my own using the same method. This way I'd have something to work on, wouldn't make Elizabeth feel rushed, and would get to try out a few new things with the process that she could potentially use in her own image- including painting back in with the asphaltum mixture, and mixing it with mineral spirits. The end result was a three-run print with two plates in the background- a light green and a white on cream paper with the key printed in dark brown.


The completed image on the stone
All things considered, Elizabeth's image turned out infinitely better than my own. :) Here's her image on the stone before processing and rolling up in black. She was a little concerned about the image being too bright, but I assured her the change from brown to black, combined with the slight filling in of really light areas made with steel wool would result in a much richer, darker final image.

We trial proofed three different colors for the background- a light tan the color of the limestone, a darker tan the color of the limestone when wet, and a murky green. The lightest tan was on a different kind of paper that had too much of a texture, but the dark tan and the green looked beautiful.

Trial proof with tan background
Trial proof with green background

Personally I liked both and could see the edition going either way. Ultimately Elizabeth decided she liked the warmth of the tan better, and the edition was pulled with her approval.

In other news a gentleman came by Tamarind to give us notice they would be filming AMC's "Breaking Bad" next door at the Denny's last week. As you can imagine they don't do a lot of filming in Fargo, so I camped out for a bit to watch the action that day. There wasn't a whole lot to see since most of the action was happening inside, but we did spot Aaron Paul who plays Jesse, and got to see this awesome "methebago" as Richard dubbed it. No idea what's going on, but once the final season airs it'll be great to see it and scream incoherently at the TV "I WAS THERE THAT DAY!"


Saturday, March 24, 2012

Las Vegas and Collaboration 3

So round about the time of my last post I got an email from Michael Barnes inviting me and my fellow classmates to attend a small printmaking conference where he was lecturing in Las Vegas, NM. Considering the amazing technique I picked up the last time Barnes did a demonstration at I immediately said yes. Come the morning of the conference around the crack of dawn as many people as possible crammed into my car and we took off on the two hour drive to Las Vegas to make it to the conference by nine.

Overall, the conference was great and consisted of a few presentations from artists on their work and technique, followed by a gallery opening and several demonstrations. The biggest room was the intaglio studio (pictured), which was fortunate since a majority of the demos were geared toward intaglio- including solar plate, monoprint woodblocks, gel medium transfers, viscosity printing, and bleached prints. As a group of litho nerds this meant we politely watched and stored this info away for future use, but also spent a good deal of time in between demos snooping through the lithography classroom. During the lunch break we decided to explore the town a bit, walking to the downtown area and checking out the antique shops, thrift stores (where cats sit on tiny chairs), and the pizza parlor with calzones the size of a human head. While walking we passed a suspiciously familiar looking hotel, and found out later most of "No Country for Old Men" had been filmed in Las Vegas, and that hotel was one of the main locations.


Around this time all back at Tamarind we switched artists and began working with our third collaborator. My next artist was Joni Tobin, an undergraduate at UNM with an absolutely gorgeous drawing style. Joni showed up with an idea in mind, and in only a few days had her image completed, which meant we got to spend a good deal of time trial proofing, which is excellent because the image really evolved through trial proofing.


Trial proofing is a time where the artist and printer work together to choose colors, discuss paper options, and (depending if there are multiple plates or stones that make up the image) discuss the order the layers are printed. Joni's image originally consisted of two parts- on one stone she had an image of herself as a child with a floral wallpaper in the background, and on another stone she had an image of her father. Both were executed in an oval shape, which gave the whole thing a very vintage, Victorian portrait kind of feel.

Joni knew she wanted her image on Kitikata paper (a thin, cream, Japanese paper), which meant we still had color and layer order to figure out. Trial proof 1 was executed with the dad in red and the child in green. Because of the vibrancy of the red the green got a little lost, and didn't quite give the brown in the overlap Joni was hoping for.


"Mirror Mirror: Eyes Just Like Your Father" by Joni Tobin

Next we tried both stones in different shades of black and Joni was much happier with the result, but still felt it needed a little more. We ended up making two other plates, one for the red in the roses in the floral background the lips, and one for the green in the stems and the eyeshadow. She explained to me that her dad used to be a news anchor, and when she was young she went with him once to the studio and witnessed people putting make-up on him before he went on air, and this print represents an exaggerated depiction of that memory.


Saturday, February 18, 2012

January and February at Tamarind- Collaborations 1 and 2

"Flying of the Bulls" by Jamie Kovach
I think I mentioned in my last post about the collaborative nature of this new semester at Tamarind. Our first three collaborations rotate on a two week basis, and our last three on a three week basis, which means in this limited time we meet with our artist, allow them time to create an image, and pull trial proofs for paper, colors, and layers until the artist is happy with the result. We limit the trial proofs to four just to stay on schedule, and because sometimes too many options just becomes confusing. Once an artist has a trial proof they like they sign is as the ATP or Approval to Print. The edition (the size is up to the artist, again, with a limit of 15 to stay on schedule) is then pulled and matched to this ATP.

So my first collaboration was with a graduate student at UNM named Jamie Kovach. Jamie mostly worked in photography and recently in painting in the style of paint-by-numbers, and while she had done some printmaking in the past, she hadn't done a lithograph. Because of this I thought it important to get her involved in the process more than just shooting a photo plate, so we transferred the image to ball grained plates, and split it up into three runs. One for the blue of the sky, one for the bulls, and then the key.

Elizabeth Sobel's print
Overall, I think for the first collaboration it went very well. Jamie was very easy-going and fun to work with, and I loved the sense of humor she had in her work. To the left is the finished print "The Flying of the Bulls." You know, like the running of the bulls. But more extreme. And with zeppelins.

To make life a little easier my classmate Richard and I have been working together, so I get to see and be a part of the collaborations he's working on as well. I won't go so much into detail, but I did want to post a picture of his artist's, Elizabeth Sobel, first print.  Elizabeth did a two run print, a tone plate in the background, with stop outs for the figures in front, and the key in black.


In between projects we still have a few demos from Rodney. Our first was on the huge Steinmesse & Stollberg (S&S) flatbed press. Rodney had us pulling flats one day, and mono-prints the next day. The whole experience was pretty cool. That press is gigantic, and a little intimidating, but very impressive. We've yet to fire it up and run it automatically, but Rodney tells us it's loud and awesome.
Richard inking up the plexiglass on the S&S
 
I missed the second day mono printing on the S&S, but luckily we had another day for mono printing on the regular Takach presses. The idea was the same- ink up a plexiglass and run it through the press.

Marvin added some Fresca, and Rodney pulled the print- clearly his finest work to date.
Back to collaborations! My second two week collaboration was with Marcos Polaco. Before we even began Marcos and I had talked about doing a maniere noir style print for the key, and I suggested Michael Barnes's method because it was easier to reduce and it was something new for Marcos to try since he had done quite a bit of litho in the past. We originally pulled three trial proofs with a blend for the sky and a blend in the supporting plate in the background, with the key on the stone. 


The first three trial proofs
After seeing the colors in the proofs Marcos decided the green was too vibrant, and didn't marry well with the areas in front where the paper showed through. A fourth trial proof was pulled with just the sky and the key, but upon seeing it and talking a little more we decided not to abandon the second plate all together and instead just create a color a bit darker than the paper to give it some definition, but not be so stark a difference that it took away focus from the key plate. This last trial proof then became the ATP. 
"Sleeping Giant" by Marcos Polaco
Marcos put a lot of time into the key, and the results were beautiful.

The image on the stone before etching and processing
Detail of some of the bushes in the foreground
Sponging away the gum to reveal the crackle effect


Friday, February 3, 2012

Semester 2 (Electric Boogaloo)

Sorry. I can't help but make a Breaking II Electric Boogaloo reference whenever possible.


A lot has happened since my last post. The year ended with a few more big projects, including an introduction to photo plates, converting those plates to waterless, and a big three color reductive stone. 

Before arriving at Tamarind I had never seen or used photo plates. We did a four color separation on the computer and printed out films for cyan, magenta, yellow and black, exposed those mylars to the photo plates and printed each plate individually. The real challenge came in perfectly registering each mylar, and printing a correct ink film- too lean and the image looks spotty; too heavy and the image feels weighed down.

Overall though, they turned out beautifully, and I felt comfortable enough using them that over the winter break I took a trip up to Fargo and did a workshop at MSUM for a few students who were still around.

However, what I really loved was the three stone reductive method. I've come to realize reductive work is one of my strengths, and I was eager to try Barnes's method again at a larger scale (nearly full sheet). For this process three primary color runs were printed and overlapped to create a variety of colors, including browns and black.


Yellow first, then red, then blue. I prepared a stone, reduced all the areas I wanted to keep white, and all the areas that didn't have yellow in them (purple, pure blue and pure red for example). I pulled the whole edition in yellow, then altered the stone, removing all the areas I wanted to keep yellow or that didn't have red in them (like green), and added areas that had red but not yellow and printed red over the yellow. The same was done with the blue. It may sound a little complicated, but with some planning on what needs to stay and what needs to go it was fairly straightforward, and the result was beautiful.


So this was the last project of the semester. Spring semester has been much different than the first. First semester focused on demos and techniques, and the second involves working with and printing collaboratively with graduate (and a few undergraduate) student artists from across the street at the University of New Mexico.

In December Rodney interviewed interested students, and seven were chosen to work with the seven of us printers. So for two to three weeks we're paired up with an artist and print an edition with them, up to four runs. Since this entry is getting a little long I think I'll save my next post for my first and second collaborations. Til then!